How to Install Anti-Tip Bracket for Stove | 7 DIY Steps
Safety should be a top priority in every kitchen, especially when dealing with heavy appliances like stoves. One crucial safety feature often overlooked is the anti-tip bracket. This a simple yet effective measure to prevent stoves from tipping forward and eliminate the risk of accidents and injuries.
To install the anti-tip mount for your stove, assess its placement to ensure it will be effective. Then, measure and position the bracket according to the manufacturer’s instructions and securely screw it into place. Double-check for alignment and mount the stove.
In this safety guide, I’ll discuss the seven major DIY steps to install these tip brackets in your kitchen, ensuring a secure and hazard-free kitchen environment. Let’s ensure your stove is securely anchored to the floor, ensuring your kitchen is safer.
How to Install an Anti-Tip Bracket for Your Stove: Easy DIY Steps to Follow
To install the anti-tip bracket for your stove, carefully follow the steps I’ve listed below:
- Assess your stove’s placement
- Measure and position the bracket
- Screw the bracket into place
- Consider power cord interference
- Double-check for alignment issues
- Take steps for gas ranges
- Mount the stove and test for stability
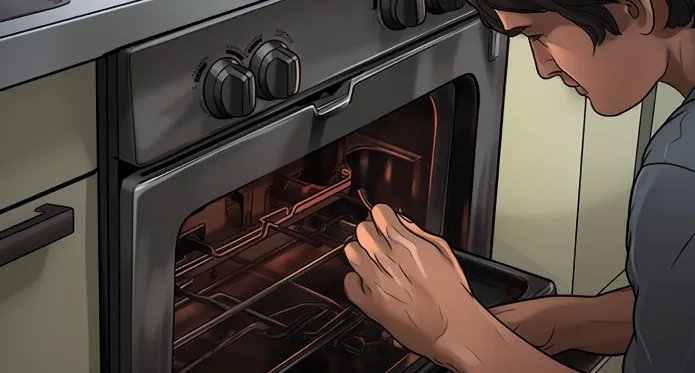
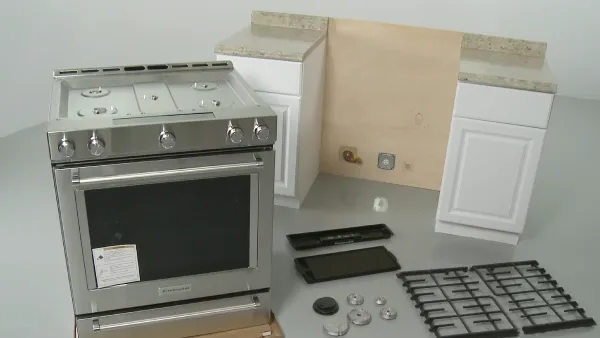
Step 1: Assess Your Stove’s Placement
Consider carefully assessing the placement of your stove before proceeding with the installation of the anti-tip bracket. When evaluating the placement, ensure that the stove is positioned in a level and stable manner.
Take note of any nearby obstacles or uneven flooring that may affect the appliance’s stability. Before moving the stove back in place, I recommend you ensure the gas is properly disconnected, the gas valve is off, and the gas line is reconnected if it’s a gas stove.
Also, consider the proximity of the stove to nearby walls or cabinets, as this may impact the accessibility for installing the anti-tip bracket. Choose the side for the anti-tip bracket based on your kitchen layout, ensuring that it allows for smooth and convenient installation.
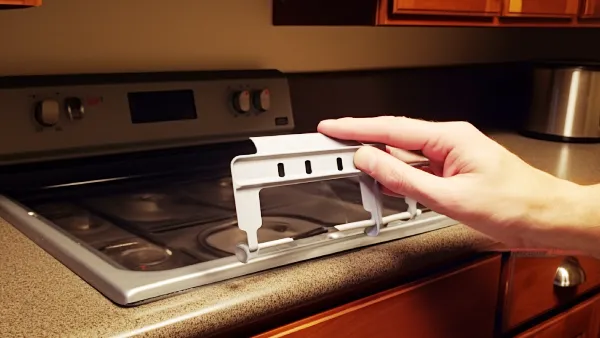
Step 2: Measure and Position the Bracket
Once you have determined the distance from outside the range, you can position the anti-tip bracket accordingly. Place the bracket so it’s centered on the back of the stove, ensuring it’s level with the floor.
The corner holes in the bracket allow for flexible attachment, whether on the left or right side. This adaptability eliminates the need to locate a stud for installation. Use a pencil to mark the spots for the screws based on the bracket’s holes.
Ensure that the bracket is positioned securely and that the screws are tightened firmly to provide maximum stability. Once the bracket is in place, proceed to the next step in securing the stove and preventing tipping hazards.
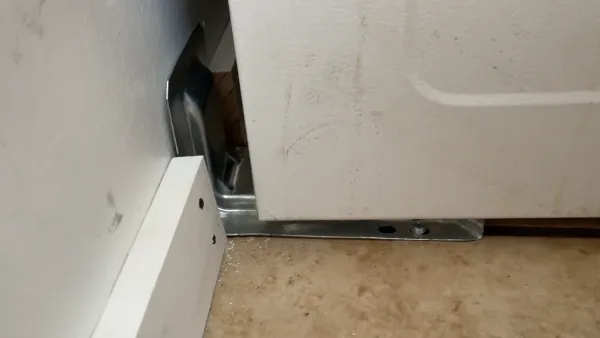
Step 3: Screw the Bracket Into Place
You’ll need a screwdriver to secure the bracket into the wall, ensuring it aligns perfectly with the support foot of your range. Position the bracket so that it aligns with the center of the support foot, and then use the screwdriver to tighten the screws firmly into place.
If possible, I recommend driving the screws into a wall stud or using appropriate wall anchors to provide a secure attachment. Fasten the bracket securely to the wall to prevent the stove from tipping effectively.
Take care not to over-tighten the screws, as this could cause damage to the wall or affect the stability of the bracket. Once the bracket is securely in place, you can proceed confidently, knowing your stove is properly secured.
Step 4: Consider Power Cord Interference
After securely fastening the bracket to the wall, assess potential interference with power cords when planning the bracket placement for the anti-tip installation. Ensure that the bracket doesn’t obstruct the power cord or create tension on the cord when the stove is moved.
Check that enough space between the bracket and the power outlet allows the power cord to be plugged in easily. If the power cord is located near the area where the bracket needs to be installed, consider repositioning the stove or using a longer power cord to avoid interference.
Step 5: Double-check for Alignment Issues
To ensure proper alignment, carefully examine the positioning of the anti-tip bracket before proceeding with the installation process. If you encounter resistance during installation, it’s crucial to double-check for alignment issues and potential cord interference.
Any misalignment could compromise the anti-tip bracket’s effectiveness in preventing stove tip-overs. Take a moment to scrutinize the bracket’s placement and ensure it aligns perfectly with the designated slots on the stove and the floor.
Additionally, verify that no obstructions could prevent the bracket from securing the stove. Addressing these alignment concerns at this stage will ensure that the anti-tip bracket performs as intended, providing essential safety measures for your stove.
Step 6: Take Steps for Gas Ranges
Check the reconnection and look for gas leaks using soapy water to guarantee a secure connection. Once the gas is safely reconnected, carefully slide the stove back into position.
Step 7: Mount the Stove and Test for Stability
Once the bracket is in place, carefully push the stove back into its position, ensuring it’s flush against the wall. Test the stability by applying gentle pressure to the top of the stove, simulating a potential tipping force.
The stove should remain firmly in place, with no tipping or rocking. If the stove feels unstable, recheck the anti-tip bracket installation and make any necessary adjustments.
Conduct this test to guarantee the effectiveness of the anti-tip bracket in preventing accidents. If the stove passes this stability test, the installation is complete and the kitchen is safe.
Why Do You Need to Install an Anti-Tip Bracket for Your Existing Stove?
You should consider installing an anti-tip bracket under your existing stove for the following reasons I’ve listed below:
1. Preventing Forward Tipping Accidents
The primary and most significant reason to install an anti-tip bracket is to prevent forward-tipping accidents. The anti-tip bracket is designed to secure the stove to the floor, wall, or neighboring cabinets, preventing it from tipping forward.
2. Mitigating Risks During Earthquakes or Events
When earthquakes occur or a child stands on an oven door, installing an anti-tip bracket is a crucial safety measure to prevent forward-tipping accidents. In areas prone to seismic activity, the sudden movements caused by earthquakes can easily lead to a stove tipping over if not properly secured.
The bracket ensures the stove remains stable and upright during such events, preventing it from toppling forward and causing harm. Additionally, securing the stove with an anti-tip bracket can help avoid costly damage to the appliance and surrounding areas.
3. Protecting Against Preventable Tragedies
Accidents resulting from the lack of an anti-tip device are often preventable tragedies. The absence of this safety feature can lead to severe injuries or even fatalities, particularly for small children.
Recognize that installing an anti-tip bracket is a simple yet highly effective measure to prevent these tragedies entirely. Prioritizing safety in the kitchen is paramount, and this small investment can save lives and prevent devastating incidents.
Protecting against preventable tragedies isn’t just about avoiding the financial cost of damaged property; it’s about safeguarding the well-being of your loved ones. Therefore, taking proactive steps to secure your stove with an anti-tip bracket is prudent and responsible.
Do I really need an anti-tip bracket for my stove?
Installing a tip-resistant bracket for your stove is crucial to prevent potentially dangerous accidents. The Consumer Product Safety Commission (CPSC) mandates that all free-standing stoves or ovens manufactured after 1991 be equipped with these brackets.
This requirement indicates the significance of these safety devices in preventing tip-over accidents. A stove tipping over can result in severe injuries or even death if it is not stabilized with anti-tip brackets. Even a momentary lack of supervision can lead to catastrophic consequences without an anti-tip bracket.
Considering the potential risks and the CPSC mandate, it’s clear that installing an anti-tipping bracket is a necessity rather than an optional safety measure. By adhering to this requirement, you’re taking a proactive step in ensuring the safety of your household and minimizing the likelihood of preventable tragedies.
How much does it cost to install an anti-tip bracket on a stove?
While the anti-tip bracket may cost around $10-20 if you choose to install it yourself, hiring a professional for installation can incur additional costs. You can expect to spend between $50 and $120 to have an anti-tip bracket professionally installed on your stove.
The installation cost can vary depending on your location, stove type, and the specific professional or service you choose to hire. However, the installation cost is worthwhile compared to the potential dangers and damages from a stove tipping over.
Do ovens come with anti-tip?
New ovens typically come equipped with an anti-tip bracket for safety purposes. This crucial safety feature prevents the oven from tipping forward when excessive weight is applied to the open oven door.
While most stores that deliver your stove may not install the anti-tip device during delivery, it’s highly recommended that you take the necessary steps to install it yourself.
The potential risk of a stove tipping over is a serious safety concern, especially in households with children or pets. Therefore, verify that the anti-tip bracket is secure to prevent potential accidents.
Secure Your Stove for Safety: Install an Anti-Tip Bracket Now
Installing an anti-tip bracket for your kitchen stove is a straightforward yet crucial DIY project that significantly enhances safety in your kitchen. By following these seven major steps I’ve listed above, you comply with safety codes and prevent accidents, especially in households with children.
Taking the time to secure your stove properly can prevent accidents and injuries and ensure a secure cooking environment for you and your family. Don’t take any chances with your family’s safety. So, go ahead and install that anti-tip bracket for your stove.
Stay safe and secure in the kitchen.
![How to Sharpen A Curved Knife | 6 Steps [DIY]](https://prokitchening.com/wp-content/uploads/2024/01/How-to-sharpen-a-curved-knife.webp)