Grinding your own coffee at home and then getting the chance to enjoy that robust flavor is a truly sublime experience.
Unfortunately, there’s the matter of cleaning the coffee grinder that you have to attend to as well. The good news is that the aforementioned process does not have to be a hassle.
If you know how to clean a grinder using the best methods, you’ll be able to enjoy even more flavorful cups of coffee more often.
Why You Need to Know How to Clean a Grinder Properly?
Because people have gotten so used to getting their coffee in packets and jars, they may have forgotten that this flavorful substance is actually organic. It is important to remember that coffee is an organic substance because that should affect the way you handle it.
As pointed out by Compact Appliance, when an organic substance such as coffee is left exposed to the elements, its quality is adversely affected. In this case, exposure to the air and heat is what you have to worry about because those can cause the coffee to lose a lot of its signature flavor.
If you continue to leave coffee residue in the grinder and then keep using it, a few things will happen.
First off, the cups of coffee you will be able to enjoy are not going to be as flavorful as they can be. Leave the grinder unclean for long enough, and the coffee you produce may just turn out bad.
Another issue that can emerge from not cleaning the grinder regularly is that you are just never going to get a completely fresh cup whenever you use it.
Freshly ground coffee is such a joy to drink, so you should do what you can to make sure you always have access to it.
1. How to Properly Clean a Blade Grinder?
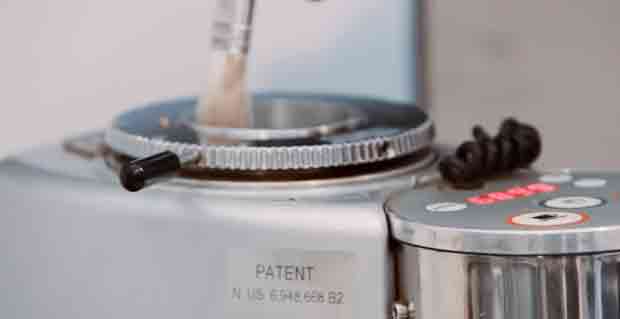
- The first thing you need to do is to get some uncooked white rice ready. You will need about a 1/4 cup to a 1/3 cup of the uncooked white rice. The amount of rice you will ultimately need will depend on how big your blade grinder is. Pour the uncooked white rice into the blade grinder.
- The next step involves plugging the grinder in and then letting it run. What you want to do here is to create some rice flour using the grinder and the uncooked rice. To accomplish that, you should let the blade grinder run for about 30 seconds to one minute.
- You now have to get rid of the rice flour that has been produced by the blade grinder. I know that it seems wasteful to just throw out the flour, but you wouldn’t want it anyway because it contains coffee residue. Unplug the blade grinder, take it off the base, and then dump the flour into the nearest garbage receptacle, making sure that there are no bits of it remaining.
- It’s now time to wipe the inside of the blade grinder clean, and you will need a damp cloth for that. You have to make sure that the cloth you’re using is just wet enough to clean up the remnants of the flour and coffee inside the grinder, but also not wet enough that it will leave blotches of water behind. Wipe the grinder with the damp cloth as thoroughly as you can but be careful not to cut yourself on the blade.
- After completing the steps above, all that’s left to do is to let the blade grinder dry. Just expose it to the air and allow it to dry at its own pace. You should also turn it upside down at some point just to make sure that there are no droplets of water that remain inside.
2. How to Clean a Burr Grinder?
- This time around, the piece of cleaning equipment you absolutely must have is a vacuum with a wand attachment. For cleaning a burr grinder, you will need the slimmest wand attachment that comes with your vacuum. With the vacuum in hand, stick it inside the grinder and try to get as much of the coffee residue as you can. This will obviously be easier with a slimmer handle because you will be able to reach into more parts of the grinder. Be thorough with the vacuum and get it into any spot it will fit in. If you don’t have a vacuum with a wand attachment, you can also make use of a can of compressed air. One more alternative is to just blow air into the grinder yourself, but you may not get all the coffee out that way.
- The hopper is the part of the burr grinder that you load the coffee beans into, and it also has to be washed. If your grinder happens to have a removable hopper, just take that off and wash it thoroughly using some soap and water. Cleaning the hopper when it cannot be removed is a bit tougher but it can still be done. Let the hopper air dry properly after washing it.
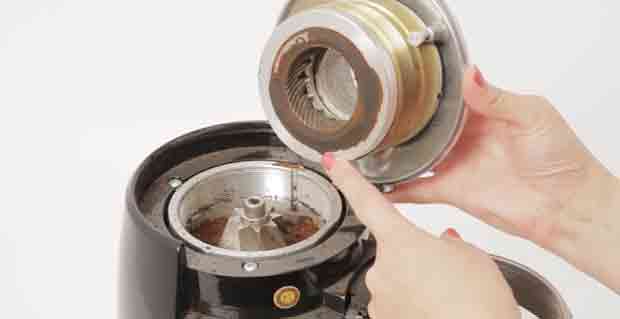
- Remove one of the burrs from the grinder. A typical burr grinder features an inner and outer burr. Consult with your manual to check which one is removable, and if a special tool is needed for the removal, then go ahead and get that as well. Follow the instructions for proper removal and be careful while doing so. If neither of the two burrs is coming out, then just leave them in there.
- You will need a brush to clean the burr. If you already have grinder brush on hand, then use that. If you don’t own a grinder brush, a toothbrush that does not feature metal bristles can be used to clean the burr. Scrub the burr you took out of the grinder, and then scrub the one that is still inside. Scrub the burrs well, but don’t be too forceful or else you may end up damaging them.
- All that scrubbing you just did was necessary for shaking the coffee residue loose from the burrs. Since the granules are now free, you can go ahead and dump them into the nearest trash can.
- The last thing you need to do is to just wipe the burr grinder clean, and for that, you should get a dry wash cloth. Wipe everything down from the burrs to the hopper, and every other component of the grinder. A dry wash cloth is essential here because you can deal lasting damage to the parts of the grinder if you use something even slightly damp.
3. How to Properly Deep Clean Your Coffee Grinder?
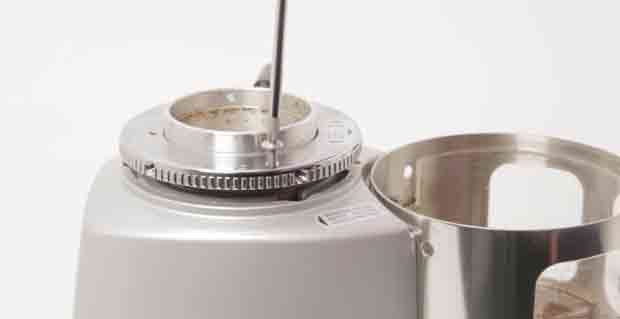
- To get started on deep cleaning your coffee grinder, you first have to grind everything still inside it. Don’t waste that extra coffee though. Just put it in a container and use it later.
- After grinding the last bits of coffee remaining, turn it off and then unplug it.
- You will now have to disassemble the grinder. Parts of it such as the grind chamber, the grind chamber lid, the hopper, and the hopper lid may be removable. Take all those removable parts and then wash them carefully with some soap and warm water.
- Following the wash, you have to let the removable parts of the grinder dry out completely. Just leave them on a shelf in your kitchen and let the air do its thing.
- Focus on the internal components of the grinder and clean them with a toothbrush that has stiff bristles.
- Remove the burr from the grinder and clean that well.
- Hold the grinder above a garbage can and then blast it clean using a can of compressed air.
- Wipe the grinder clean.
- Re-attach the burr and make sure that it is properly secured.
- Clean the exterior of the coffee grinder using a piece of cloth.
Regular Cleaning of the Coffee Grinder is Key
As you have seen from this article, cleaning a coffee grinder is not exactly a process you can complete in a hurry, but it also won’t take up your entire weekend afternoon.
Cleaning a grinder may seem more trouble than it’s worth given that you can still use one that hasn’t been cleaned in a while to produce coffee. However, if you fancy yourself a true coffee connoisseur, you must recognize that cleaning is a necessary step to take in order for you to get only the most delicious drinks.
It may take some time and effort to properly clean a coffee grinder, but you won’t regret doing so once you’re able to sit down and enjoy a cup of your latest brew.

