Nothing pleases a coffee connoisseur quite like a fine cup of espresso. However, many shy away from making espresso because they think that it is an overly complicated process.
The truth is you can make espresso pretty easily as long as you know the right steps. In this article, we’ll talk about how to make espresso with a coffee maker.
Ingredients You’ll Need:

Espresso Beans
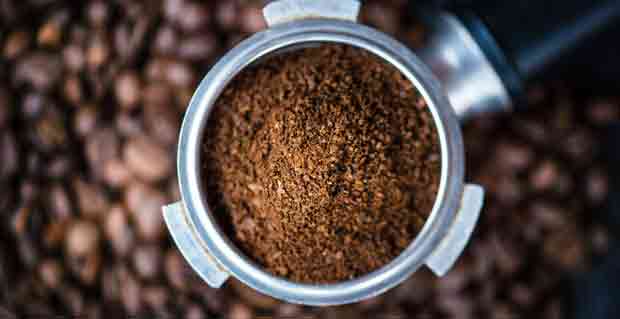
To be more specific, you will need ground espresso beans. As much as possible, you should use freshly ground coffee beans if you have a grinder at home. If you don’t have a grinder, you can still go to the store and pick up some ground beans that were roasted recently.
Filtered Water
The other essential ingredient you need for making espresso is filtered water. Unfiltered tap water is not ideal because that mineral taste can affect the flavor of the espresso. You should also avoid using water that is currently boiling for making espresso. The boiling water will only serve to make the espresso creation process trickier than it needs to be.
How to Make Espresso with a Coffee Maker?

Step 1: Choosing the Coffee Beans
You can’t go wrong during the bean selection process because there are no wrong options. It’s all about your preferences at this point. This is where you should feel free to experiment, so choose different beans until you find the ones you like the most.
Step 2: Grind the Beans Properly
For the grinding process, you will want to use a burr grinder. A burr grinder is better suited to getting the beans to the state where you need them to be. You have to be careful about under or over-grinding the beans though. Under-grinding the beans could result in the espresso lacking flavor and over-grinding may result in a cup of coffee that’s too bitter. Practice will make perfect during the grinding process.
Step 3: Put The Water Into the Machine
The next step in the process involves opening up the reservoir of your coffee maker and then placing the filtered water in there. Ideally, the temperature of the water should be around 200 degrees Fahrenheit because that is also the heat level you will need to complete the extraction process.
Step 4: Store the Ground Espresso Beans You Won’t be Using

If this is your first time making your own espresso, chances are that you’ve ground up more beans than you’ll actually need. Don’t worry because you can just store and use them later. Make sure to store the beans in an airtight container and then place them somewhere not reachable by moisture or the sun. Just don’t wait too long before using those beans or else they may not have that much flavor left.
Step 5: Clean the Portafilter
Next up, you need to remove the portafilter from the machine. Don’t just grab it right away though. Use a cloth to grab the handle because the portafilter is likely hot. Pick up a different piece of cloth now and then use it to wipe the inside of the portafilter clean.
Step 6: Put the Ground Coffee Beans Inside the Tamper
It’s now time to put the beans into the machine. You’ll want to put seven grams of the ground coffee into the tamper. Use a scale if you’re not great at eye-balling just yet. You should also choose to apply 30 pounds of pressure for efficient extraction.
Step 7: Begin Pulling the Espresso Shot
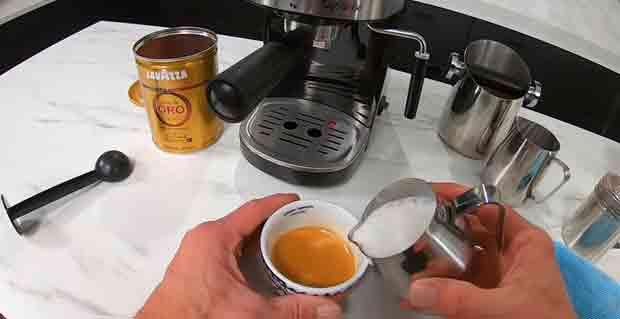
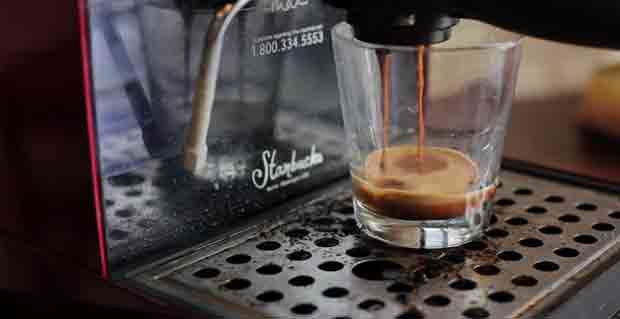
With the beans now in the right place, you can start the brewing process. In order to do that, you will first have to place your cup near the spout. Once that’s done, go ahead and turn on the machine. Continue to pull the espresso shot and eventually, you’ll see something dripping into the cup.
When you take a closer look at the cup, you’ll notice that the substance filling it up is thick and creamy. That is the crema and it is a signature component of any cup of espresso. Keep on pulling until the cup fills up.
Step 8: Complete the Brewing Process

The good news is that you won’t have to keep pulling the espresso shot forever. In fact, you won’t even need to pull it for five minutes. The entire brewing process should be done in about a minute or so, meaning you don’t need to wait long for that cup of espresso you’ve been coveting.
Step 9: Look for the Sign Indicating that You Need to Stop the Shot
If you want a double shot of espresso, you’ll need to pull the shot for a longer time. However, there is a sign that will tell you if you’ve been pulling for too long. Look at the espresso pouring out and see if the liquid has turned blonde. The moment you see the shot turn blonde, you need to stop pulling.
Step 10: Enjoy the Cup of Espresso
With the cup filled, you can now proceed to enjoy it yourself or serve it to someone in need of a quick caffeine boost. If you want a quick afternoon snack, go ahead and enjoy the espresso together with a cookie or a type of pastry you prefer.
Enjoying the espresso as it is would already be a delightful experience, but if you want to try something different, you can use it is an ingredient in another drink. Shots of espresso are commonly used to flavor lattes and cappuccinos. It will take a little more work to create a latte or a cappuccino, but it will be worth it.
Espresso is a favorite beverage for many, but not a lot of people are able to enjoy it on a regular basis because they fear the brewing process is too difficult. As you have seen, the espresso creation process is far from challenging. Instead of settling for flavorful cups of coffee, you can now make every morning and afternoon more exciting by brewing and enjoying your own cups of espresso.


